Equation Overrides : 2009.3 and Later
Version |
Date |
Changes |
1.0 |
2009-11-20 |
Initial version. |
Description
This project presents the customizations that were developed in conjunction with Jesse Wiles for improved equation handling in ePublisher 2009. Note that this was developed using FrameMaker as the source format.
Contents
- Equation Overrides : 2009.3 and Later
Problems with Equation Rendering
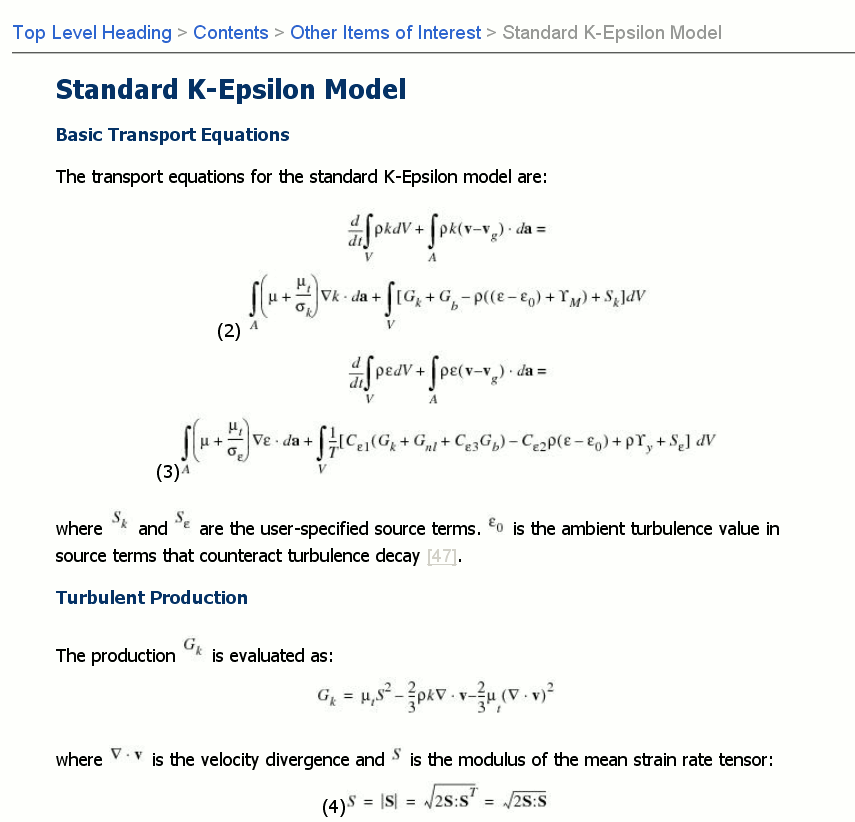
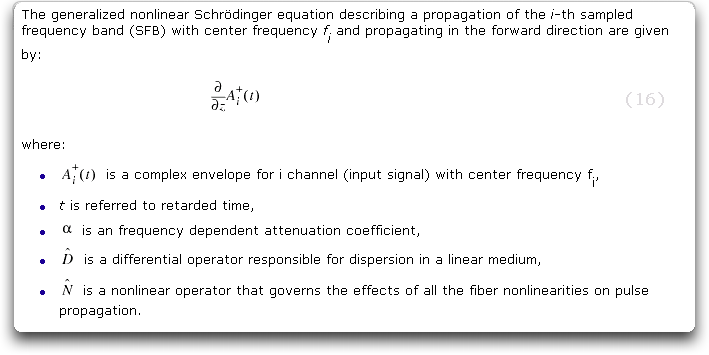
The problems addressed in this project are illustrated in the graphic below. The equation numbers are not aligned correctly at the right hand side of the equations, the resolution at which equations are rendered can not be controlled, and the inline equations appear to float some way above the baseline. These have been addressed with customizations.
Customization 1: Labeling an Anchored Frame as a Graphic
![]() Beginning with ePublisher 2009.3, all Anchored Frame elements are tagged with a class attribute in a WIF file from the FrameMaker tool adapter. The value of this attribute includes a space-delimited list of chararcteristics for a given Frame. All Anchored Frames are tagged with the frame/frame characteristic. Equations are additionally tagged with a frame/equation characteristic. Following is an example of an Anchored Frame Equation element in a WIF file produced by 2009.3 and later versions of the FrameMaker tool adapter:
Beginning with ePublisher 2009.3, all Anchored Frame elements are tagged with a class attribute in a WIF file from the FrameMaker tool adapter. The value of this attribute includes a space-delimited list of chararcteristics for a given Frame. All Anchored Frames are tagged with the frame/frame characteristic. Equations are additionally tagged with a frame/equation characteristic. Following is an example of an Anchored Frame Equation element in a WIF file produced by 2009.3 and later versions of the FrameMaker tool adapter:
  <Frame id="123456" class=" frame/frame frame/equation ">
   ...
  </Frame>
Customization 2: Modifying the nameinfo.xsl file
The goal is to be able to apply a default graphic style to every equation. Now that frames containing equations can be detected, it is possible to modify the nameinfo.xsl template so that equations frames detailed in the splits_uniquenames.xml file (created for each project in the users data directory tree) will have the correct stylename associated with them.
The modification required here is shown in the nameinfo_modified.xsl file attached (click here). Search for the comment <!-- Begin Customization --> to see the change, and continue to the point <!-- End Customization -->. This customization must be inserted at the correct point in the file. If the attached file is to be used directly, rename it to nameinfo.xsl.
Placement of the file
To override all targets that use the WebWorks Help 5.0 format, create a format override directory for your ePublisher Pro project (select View > Format Override Directory in ePublisher Pro). This assumes you have opened or created a project using the WebWorks Help 5.0 format.
Within the WebWorks Help 5.0 directory that will be shown, create the following directory structure:
Shared\common\splits\
Copy the modified nameinfo.xsl file to this folder. The complete path to the file will therefore be something like:
[PROJECTDIR]\Formats\WebWorks Help 5.0\Shared\common\splits\nameinfo.xsl
The effect of this modification will be seen in the splits_uniquenames.xml for your project. This file can be found by selecting View > Data Directory from the ePublisher Pro menubar. Navigate one level down from the folder(s) contained within this location, and you should see the splits_uniquename.xml file. Any frames containing equations will have the attribute stylename="EquationGraphic".
Create the EquationGraphic graphic style in ePublisher Pro
In your ePublisher Pro project, create a new Graphic Style called "EquationGraphic", as shown below.
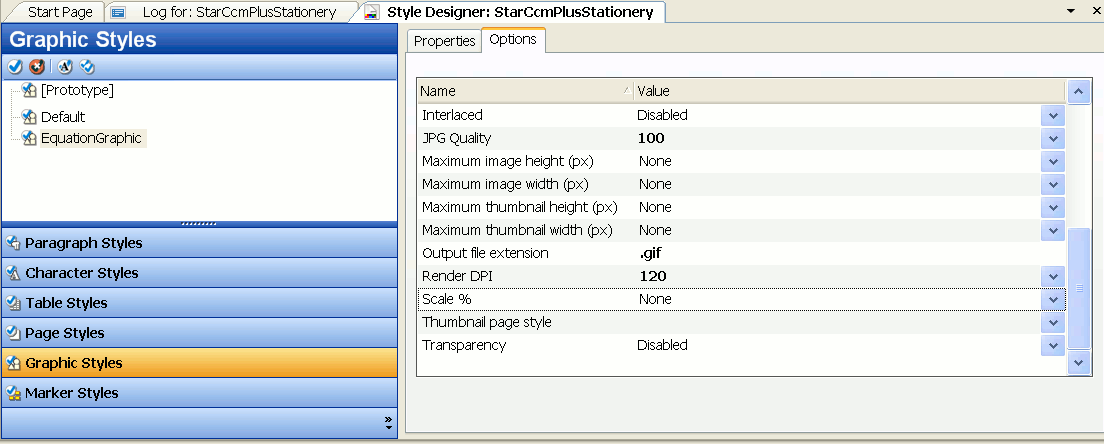
By virtue of the modifications made previously, the settings for this style will be applied to all equations. In the example above, the Render DPI has been increased to 120, and the output type was change to GIF instead of JPG.
Customization 3: Placing the Equation Number on the Right-Hand Side
The solution here is to create a two-cell table that will have the equation graphic in the first cell, and the equation number in the second cell. The XSL code for this is placed in a content.xsl file, located within a format specific override directory.
Using the same approach as before, create the following override directory for the WebWorks Help 5.0 format directory:
Transforms
The content.xsl file attached (click here) should be placed in this directory. The complete path to the file will therefore be:
[PROJECTDIR]\Formats\WebWorks Help 5.0\Transforms\content.xsl
It should be noted that this particular section of code depends on the source Framemaker document having a Paragraph Style called "Equation" that is applied to all anchored frames containing equations. If a different Paragraph Style is used, the appropriate name should replace Equation in the match statement of the XSL instruction in content.xsl. This line is shown below.
<xsl:template match="wwdoc:Paragraph[@stylename = 'Equation']" mode="wwmode:content">
Customization 4: Placing in-line equations on the line
This customization is achieved by creating an Additional CSS class for the EquationGraphic graphic style referred to previously. Inline equations will receive the EquationGraphic graphic style.
Create a custom css file
To do this, select View > User Files from the ePublisher Pro menu bar. Within the [PROJECTDIR]\Files directory that appears, create a css directory. Copy the custom.css file attached click here to this directory. The complete path to the custom.css file will be:
[PROJECTDIR]\Files\css\custom.css
Add the CSS class to the EquationGraphic graphic style
This is illustrated in the graphic below:-

Final Output
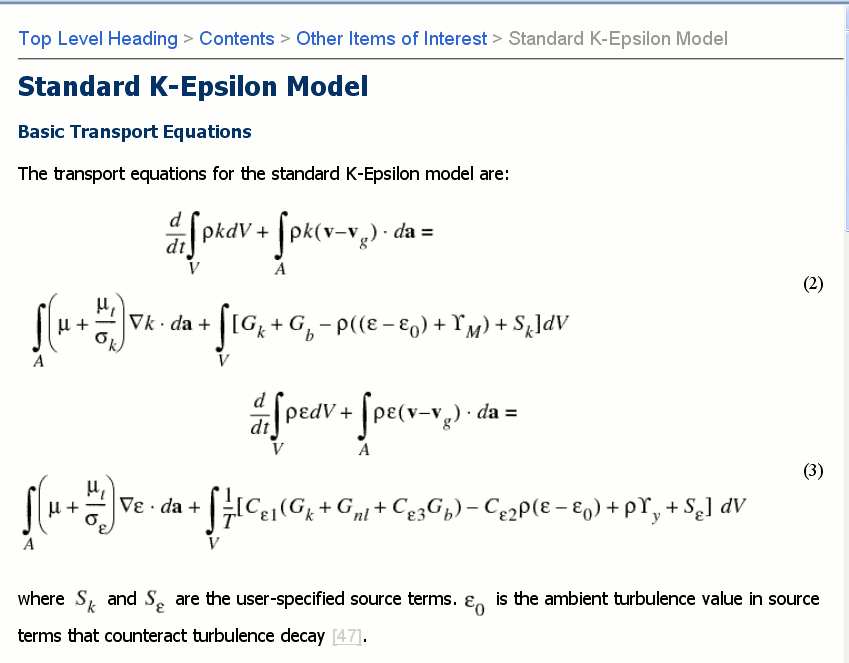
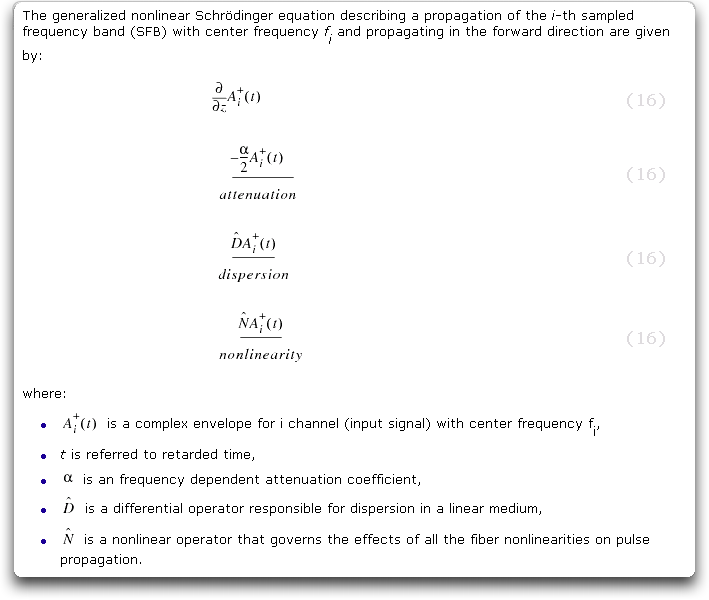
If everything works as intended, the final output should contain improved rendering and positioning of equations:-
Caveats
![]() Note: This solution assumes only one equation will be present in each paragraph. In cases where several equation objects are included in the same paragraph, only the first equation is rendered. (Without this customization, both/all appear.)
Note: This solution assumes only one equation will be present in each paragraph. In cases where several equation objects are included in the same paragraph, only the first equation is rendered. (Without this customization, both/all appear.)
Multiple Equations Example
The attached sample FrameMaker (file) contains a line with mixed content (several equations interspersed with text). Before this customization, the content was rendered as follows:
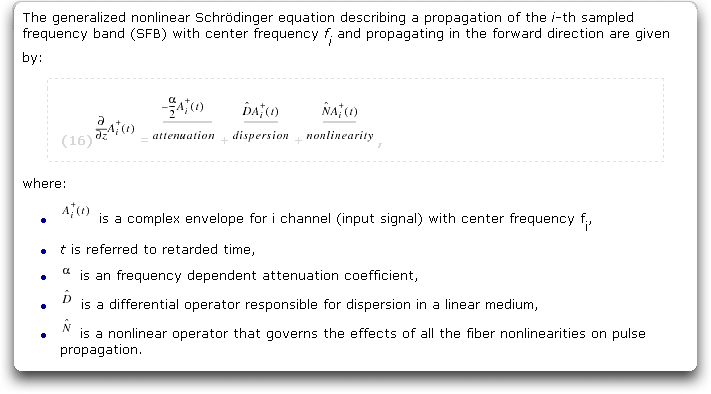
After implementing the customization described here, the output looks like this (only the first equation is rendered):
Ben's for-each suggestion from the discussion page produces a new table for each equation in the paragraph, each with the number of the initial para:
Any suggestions on how to include everything that appears in the paragraph within the left cell of the table?